Your Recent Search:
Road Repair Techniques: Repairing vs. Reshaping
June 5, 2018
Gravel roads are farm to market roadways. As traffic has increased and gravel roads become more prevalent and are carrying larger loads it’s imperative to follow good maintenance protocol to keep roads safe and stable. You can think about gravel road maintenance in two categories: repairing and reshaping.
Repairing focuses on general maintenance and reshaping is done when the road crown has been ground down and the road is full of potholes and other hazardous driving concerns. Employing these techniques will facilitate proper water drainage and prevent erosion of both the road and its surroundings.
Here are some things to remember when repairing and reshaping your roads.
REPAIRING
Below are some helpful tips to remember when repairing (also known as smoothing) a road.
1. TIMING
The best time to do this is after it rains, and the ground is sufficiently wet. This will help the grader get through the aggregate easier and increase the lifespan of your blade. However, if that’s not possible, water the road with a water truck before beginning work.
2. DIVIDE THE ROAD INTO HALVES
Repair only one-half of the road at a time to allow for traffic flow during the process and to maintain the crown of the road.
3. CREATE THE WINDROW FIRST
Blade the surface to form the windrow and then spread the windrow evenly.
4. COMPACTION IS YOUR FRIEND
Add water as necessary to promote good compaction for the ongoing health of the road.
RESHAPING
When repairing is no longer an option, it’s time to fully reshape the road.
1. TIMING
The best time to do this is after it rains, and the ground is sufficiently wet. This will help the grader get through the aggregate easier and increase the lifespan of your blade. However, if that’s not possible, water the road with a water truck before beginning work.
2. PATCH BEFORE YOU GRADE
Patch up pot holes, ditches, and depressions before reshaping- good drainage is essential!
3. SCARIFY HARD SURFACES
If the road surface is super hard employ a scarifier to break it up. This will help with cutting, control dust, and aid in compaction.
4. CUT DEEP ENOUGH
Set the moldboard at a 30%-45% angle from the motor graders axis. You’ll want to cut deep enough to remove all surface imperfections and restore the crown.
5. GRADE TOWARDS THE CENTER
Retrieve aggregate back to the center so you don’t lose the fines in gravel. The aggregate is a combination of stone, sand, and fines, and you want to try to keep the blend of these intact.
6. MOLDBOARD ANGLE
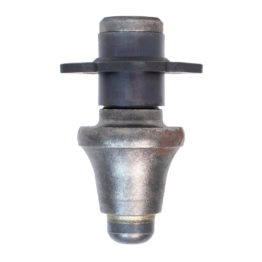
When beginning the layout process, adjust the moldboard so it tilts fully forward. However, if your grader has a carbide bit system, keep the moldboard vertical.
Subscribe to our blog
Get notified when we post a new article
"*" indicates required fields
